Concrete preparation is very important to the success of any concrete project. If you take the time to prepare the site and pour the concrete properly, you will ensure a strong, durable finished product.
Proper preparation makes pouring concrete much easier and can result in a better-looking finished product. This guide will give you tips on how to properly prepare and pour concrete.
Contents
Gather Your Tools and Supplies
Before you can begin, you’ll need to make sure you have all the supplies and tools you’ll need. This includes a measuring tape, gloves, eye protection, a level, a straight edge (such as a 2×4), a trowel, a hoe, shovel, and a wheelbarrow.
You will also need a concrete mix, water, and a way to vibrate the concrete (such as a hand-held power drill with a mixing attachment). The amount of concrete you’ll need will depend on the size and thickness of your project.
Prepare the Area

The first step is to properly prepare the area where you will be pouring the concrete. This means ensuring that the ground is level and free of any debris or obstacles. If you are pouring a sidewalk or driveway, you will need to make sure that there is a solid base for the concrete to set on.
This may require excavating the area and then adding a layer of gravel. Remove any vegetation or organic materials from the area as well. If you are pouring concrete on top of dirt, you will need to remove any grass or weeds that are growing in the area.
You should also loosen the dirt so that it is easier for the concrete to set. You can as well contact folks at https://craftsmanconcretefloors.com/polished-concrete/ for more tips.
Once the area is prepared, you will need to mark the perimeter of where the concrete will be poured. This can be done with stakes and string or by using spray paint. Make sure that you leave enough space for the concrete to be poured and spread out.
Compact the Subgrade
Before concrete can be poured, the subgrade must be properly compacted to provide a solid base. Otherwise, the concrete could crack or settle unevenly. The subgrade should be compacted in layers no thicker than eight inches. A plate compactor can be used to compact the subgrade.
It is important to start in the corners and work your way out. Though, be careful not to over-compact the subgrade as this can also cause problems. However, under-compacting the subgrade can lead to an unstable foundation and cracks.
Add the Sub-base
A sub-base is required for most concrete jobs. It gives the concrete something to grip on and prevents the ground from shifting when you pour the concrete. The sub-base can be made up of gravel, sand, or crushed rock. It should be at least four inches thick and should be compacted before you pour the concrete.
This can be done with a hand tamper, or by running a plate compactor over the area. More so, If you are pouring concrete over soil, you will need to excavate the area and add a sub-base.
Build a Form
The first step is to build a form out of lumber that will contain the concrete. The size and shape of the form will depend on what you are using the concrete for.
Once you have built the form, make sure that it is level and supported well. The last thing you want is for your form to collapse while the concrete is wet. This step is very important, so take your time and do it right. It is also a good idea to put some type of release agent on the lumber so that the concrete does not stick.
Mix the Concrete
The process of mixing the concrete is extremely important, as it will determine the strength and durability of your finished product. Be sure to follow the directions on the bags of cement mix, and add the appropriate amount of water. Too much water will make the mixture too runny and weak, while not enough will make it difficult to work with. It’s best to err on the side of caution and add a little less water than is recommended, as you can always add more if needed.
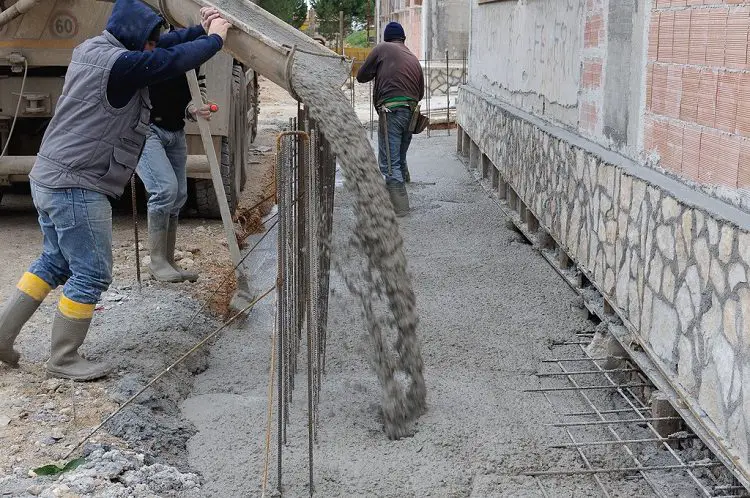
Pour the Concrete Mixture
Start by wetting the ground where you will be pouring the concrete. This will help the concrete to cure properly. Then, pour the concrete mixture into the mold or area where you want it to be set.
Start in one corner and slowly move the hose in a circular motion as you pour. Once you have poured all the concrete mixture, use a trowel to spread it evenly. This will help to prevent air pockets from forming.
Groove the Concrete

The first step is to groove the concrete. This is done with a concrete saw. The grooves need to be 1” deep and at least as wide as the slab itself will be.
The purpose of the grooves is twofold; they allow rainwater to drain off of the slab so that it does not pond on top of it, and they also provide a space for the expansion joint material. This is a very important step and one that should not be skipped.
In conclusion, following these tips on how to properly prepare and pour concrete will help ensure a successful project. Taking the time to do things right the first time will save time and money in the long run. Properly preparing the site, using the correct concrete mix, and pouring it correctly will result in a durable and long-lasting finished product.


