I think it goes without saying that many woodworkers and DIYers can often get by with using a handheld saw for the majority of their basic work and sawing tasks.
While this may be true, other types of saws can sometimes not only make the job easier but make the results more consistent and of higher quality as well.
One of the best examples of this is a table saw. As I’ll explain below, a table saw is one of the best tools you can add to your workshop, and if you’re planning on adding a mounted saw to your inventory, this should probably be the first one.
Simply put, a table saw allows you to make quick work of large pieces of wood, along with the times when you need to saw multiple pieces for a big project. Even if you just need a quick square cut on a 2×4 you’re using to replace a fence piece, a table saw is always best.
If you’re someone who is a little unfamiliar with table saws and what they’re best for or just need a little info on how to properly use one, this is where you need to be.
This article will give you a crash course on all the essential information you need to know about table saws, including types, history, safety, and more than a few how-tos.
Let’s get to it.
Contents
What Is A Table Saw?
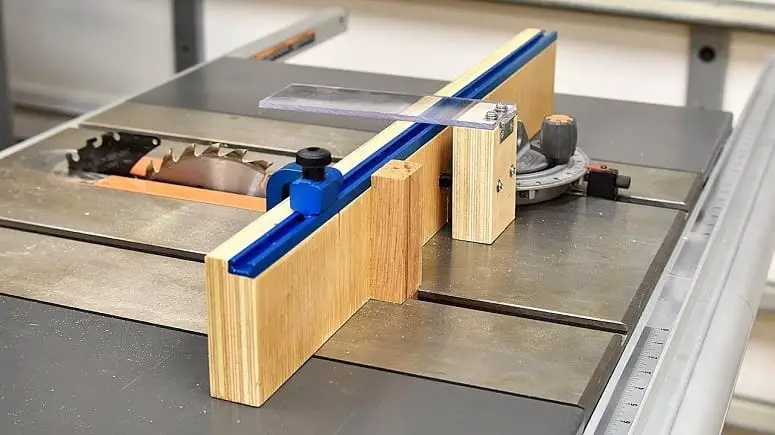
The term “table saw” can be a little vague in a general sense at first, especially if you’re already aware of saws like a band saw, which also uses a sort of flat surface around the blade.
A table saw typically uses more of a table-like setup, so it gets the official designation of being the real table saw — at least that’s how I explain it to myself.
So what exactly is a table saw?
Well, in the most primitive of descriptions, a table saw is a circular saw that has been mounted under a table surface, with a part of the blade protruding above the table, where it is exposed and able to cut wood.
The saw’s exposed portion allows the table saw to offer a continual cutting apparatus that lets users feed workpieces into the blade in a more controlled, measured, and accurate way.
The table portion is equipped with several ways to measure the cut and set different angles and such.
The saw assembly is mounted onto an arbor, which holds the saw in place, and allows the user to adjust the cutting depths and angles. The table is responsible for how the workpiece is fed to the saw blade.
Although very simple in nature, a table saw offers countless uses for woodworking, and also provides a large amount of convenience and consistency. It is the exact opposite of freehand cutting in every way.
When used properly, a table saw can be counted on to ensure robot-like accuracy on a number of different cuts, no matter how many workpieces you have lined up that need cutting.
And while many models are made to be transported to and from jobs and/or stored away, having a table saw setup in your shop gives you a fast, efficient, and convenient way to make fast and accurate cuts in a hurry when needed, instead of having to get everything all set up.
History Of The Table Saw
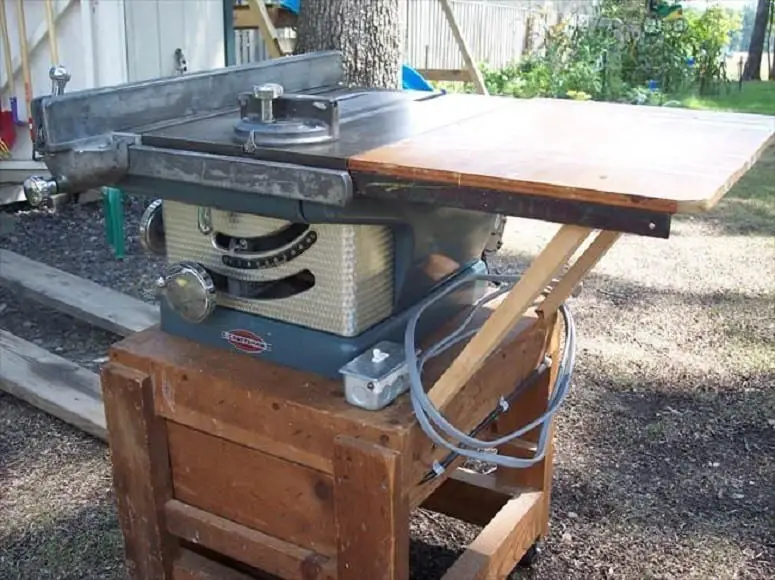
When recounting the history of the table saw, it’s basically a tale of both the circular saw’s development over time, and also the implementation into a table saw assembly. The general table saw history dates back over the past 250 years or so.
Everything can be traced back to 1777, when Samuel Miller produced what was the first actual circular saw, although he likely got the general idea from other people. Still, he was the first to go ahead and make one, so he wins. His saw was merely a circular disc with sharp teeth.
1878 is when things really got interesting. W.R. & John Barnes in Rockford, Illinois developed a mounted circular saw with a table that was operated using a treadle pedal, kind of like those old sewing machines where the pedal was used to pump the mechanisms that drove the needle.
These saws ended up being very popular and began to show up in lumber yards and woodworker’s shops. They remained popular over the next several decades, as models became more advanced. Raymond Dewalt’s radial arm saw design was a major player later on as well.
In 1929, Art Emmons of Porter Cable invented the first portable circular saw, which used a helical drive with an electric motor. The strategic and influential design resulted in a lightweight and compact shape that allowed workers to take the saw to their worksite, rather than vice versa.
From there, a number of new developments and features were implemented into common table saws, resulting in the more advanced and lighter versions we now have today. Our friends from SawPicks did a great article on table saws.
Table Saw Anatomy
In order to have a better understanding of a table saw, it’s best to know all the parts and what they are responsible for.
Table
This is obviously the namesake of the table saw, and where most of the features and basic functions of the table saw are located.
The table can come in a variety of materials but is almost always metal for obvious reasons. Cast iron and heavy-duty steel are common choices for the majority of table saws.
The table is where the workpiece is laid before cutting and acts as a support for the wood as it’s guided into the saw blade. The table typically has units of measure clearly marked on the sides and contains slots for things like the rip fence and miter gauge.
A table’s size has a large effect on how big of a workpiece can be comfortably handled and accurately cut. The bigger the table, the bigger the wood it can hold. Some models come with table extenders that fold or pull out.
Saw
This is the part that does the cutting. The saw portion is a circular saw mounted on an arbor that gives it the proper angle and placement while keeping the saw completely firm and steady.
These circular saws tend to be very powerful, and typically come in 10-inch blade size, although some larger cabinet models can get as big as 12 inches.
The saw can usually be moved up and down to expose more or less blade for that particular sawing task, and most models also allow the blade to be tilted to one site to make bevel cuts, often up to 45 degrees.
Blade Plate
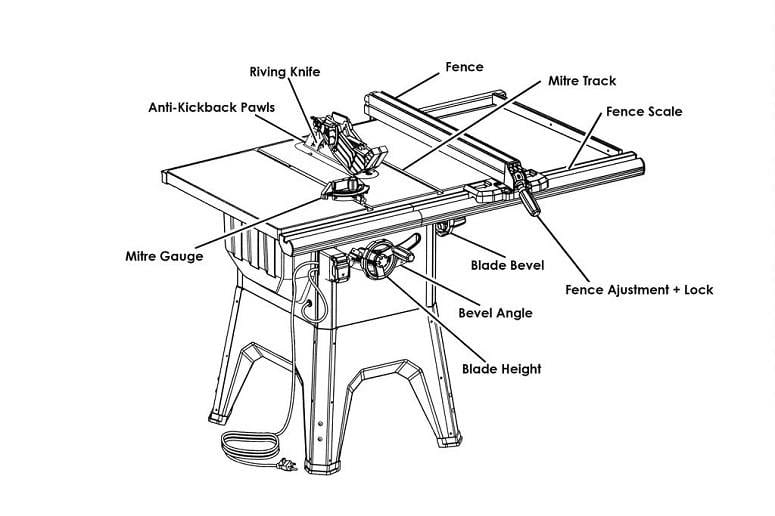
The blade plate is the area around the slot where the saw blade rises up and above the table. The plate protects the table and the saw blade and provides some additional reinforcement. A standard blade plate allows for all basic cuts, while dado cuts may require a dado plate to be used instead.
Blade Cover
As the name suggests, a blade cover is used to protect both the blade and the user when cuts are being made. The cover fits directly over the saw blade and is curved to match its shape as well.
As a workpiece is being fed to the saw, the cover is lifted up and rests on top of the workpiece, which provides some added security against kickback. The blade cover is usually transparent so that the user can still see exactly where the blade is during cutting.
Anti-Kickback
Kickback is a major concern with a table saw safety. When a workpiece is not secured properly, or there is some sort of accident while feeding the wood to the saw, the motion of the saw can catch the wood and send it flying off in whatever direction, posing a risk to the user, and damaging the workpiece or nearby equipment.
Anti-kickback claws are mounted on the rear side of the blade cover and look like spiked claws that angle down and rest on the workpiece as it is fed through, sort of like little tiny fingers that gently hold the workpiece down.
If there were to be any amount of kickback, the claws, are barely able to rise above the saw’s cutting capacity height, so they catch the workpiece and prevent it from going flying.
Rip Fence
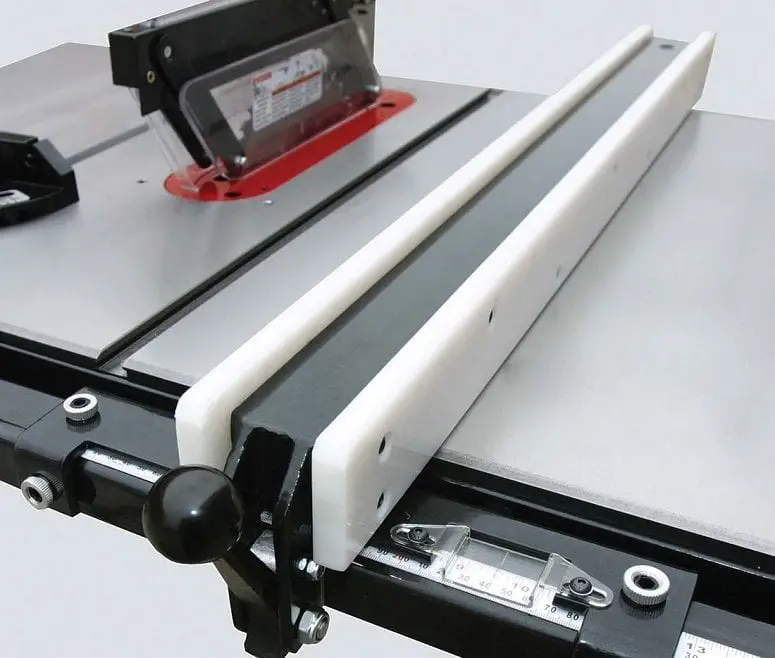
The rip fence is used to help guide workpieces when making rip cuts. The fence is designed to be stable, providing an immovable guide that keeps the workpiece exactly where it needs to be.
The fence runs parallel to the blade and can be adjusted to the left and right, letting the user rest the workpiece exactly where it needs to be as it’s cut by the blade. Without a rip fence, the user has no real way to ensure that a straight line is kept as the piece is cut.
The rip fence’s maximum distance away from the blade is the rip capacity, which indicates the maximum size of a workpiece that can be properly placed against the fence and within the sawing area.
Miter Gauge
Miter gauges, like rip fences, are an object that rests against the workpiece as it’s fed into the saw blade. However, instead of a straight line, the miter adjustment allows the user to position the board at the desired angle for miter cuts.
The miter gauge is typical to the left of the saw blade area and slides parallel up and down the table in its predetermined slot area. The gauge can be adjusted anywhere from 0 to 90 degrees.
Bevel Angle Gauge
Most table saws are capable of offering bevel cuts, so there obviously needs to be a way to see what angle you have the blade set to. Bevel angle gauges are often located on the perpendicular end of the saw’s cage, just below the table.
This gauge also has the handle for adjusting the bevel angle, so you can see exactly what angle you are tilting the saw blade to.
Blade Height Adjustment
The final portion of the blade’s adjustment is the height aspect. This handle is almost always located either directly above or below the bevel angle adjuster, and generally takes the form of a hand crank.
Cranking the handle to one direction will cause the saw blade to rise up out of the slot while turning the handle to the opposite angle causes it to retreat back into the table’s slot.
These adjustments are necessary in order to match the saw’s cutting height to the workpiece being cut. Too low, and it won’t cut all the way through. Too high, and the cut may not be as clean and may cause kickback as well.
Stand
Saws that are not secured to a bench or worktop will need some sort of stand. The functions of the stands differ depending on the type of table saw being used.
Table saws that are geared towards being more portable will have collapsible stands that also include rollers or wheels, while cabinet versions and table saws not really meant for frequent transport will have more heavy-duty stands that are bolted or clamped to the saw.
Table Saw Types
Table saws are generally simple and uniform on their basic design. With that said, there are several different types to choose from, each offering distinct advantages and ideal uses. Here are the most popular table saw types.
Benchtop
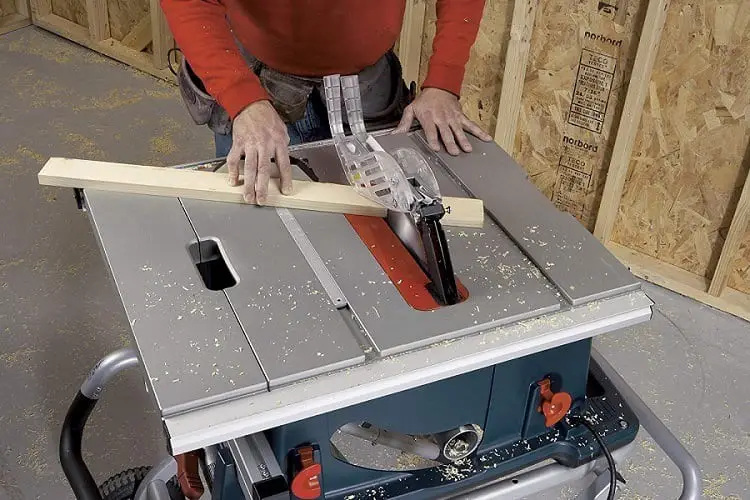
Benchtop table saws are the smallest regular type of table saw, and like the name suggests, they can be mounted onto a benchtop when being used. Despite the name, however, many benchtop table saws actually come with their own collapsible stand to be mounted on.
These saws were actually known as job site saws prior, but the continued development and progression of job site table saws has resulted in benchtop table saws being in their own category.
Benchtop saws are sometimes referred to as compact table saws, although benchtop models can be found in several different sizes. Still, they tend to be on the smaller side of things and are usually highly portable.
Benchtop saws have a smaller rip capacity and less powerful motors, but that’s to be expected given their nature. Many professional contractors will keep a benchtop table saw around for easy transport to work sites when needed, and many homeowners find all they need in a benchtop table saw period.
Jobsite
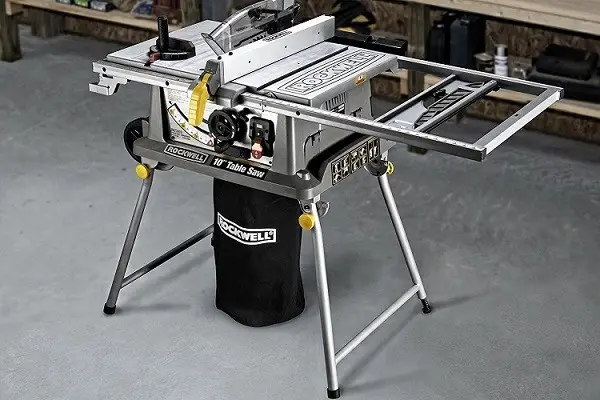
Jobsite table saws are typically a mix of portability and larger capacity, walking a fine line between both. Once again, the name refers to their ideal use: being taken to and used at an actual job site.
These table saws are larger and heavier than benchtop models, but still, retain a good sense of portability and mobility thanks to their design. It’s common to see job site table saws with collapsible stands attached to the body that include heavy-duty tires or wheels.
Despite the larger size and weight, job site saws are meant to be lifted by one person, whether that’s into the back of a truck, trailer, or wherever else the saw can fit when being transported.
Technological developments over the last several years have resulted in job site saws that can compact down to much smaller sizes when not in use, while having extendable table surfaces and rip fences and more powerful engines that are more geared towards heavier work as well.
Contractor
Contractor table saws may sound like portable heavy-duty saws due to their name, but they are actually more intended to be stationary within a shop. These saws were developed as a cheaper alternative to the larger cabinet table saws, while still retaining a high amount of power and capacity.
Contractor table saws are known for having powerful motors, a large saw and rip capacities, and a more stable surface that is less prone to vibrations when in use, making them perfect for intensive and more detailed sawing in a workshop setting.
Cabinet
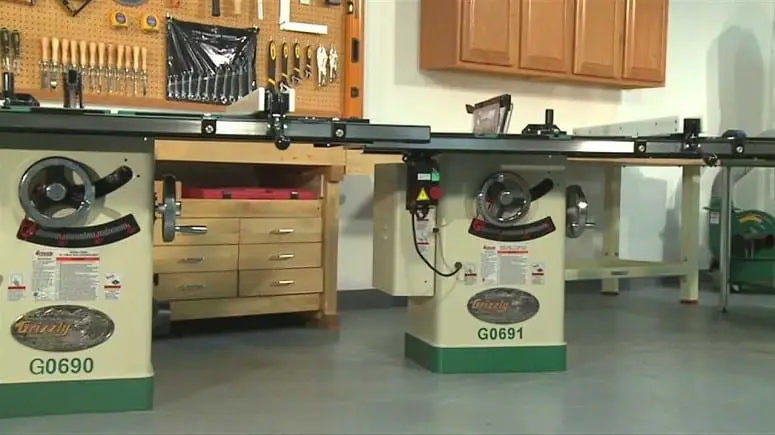
Designed for the most heavy-duty and professional users, cabinet saws are the ultimate in sawing power and overall working surface size.
The large, seemingly unmovable table saws provide ample working surface space, huge rip fences, and incredibly powerful saw assemblies that can easily slice through any workpiece without any real kickback or loss of torque.
Cabinet saws are also the most expensive. While these are great for heavy and professional use, the average DIYer or even low-level contractor will have no need or real use for a cabinet table saw.
Hybrid
A hybrid table saw offers a strategic mix of cabinet saws and job site saws. On one hand, you get the versatility and lower weight of a job site saw, and on the other, you get a cabinet-style design that provides better stability, along with the cabinet which aids in dust collection.
Mini
Mini table saws are mostly a rarity, but there are some people that enjoy and/or have a real need for them. Mini table saws are often used by hobbyists who routinely deal with crafting models.
Mini table saws can usually measure about 4-5 inches, and have tiny moving parts. While these are great for model building, some savvy woodworkers can find some strategic ways to use them too.
Table Saw Uses
Table saws can perform a number of different cuts and have a broad range of applications as well.
Cross Cuts
A crosscut is one of the most basic types of cuts in any class of woodworking. Cross-cutting is the simple act of cutting against the grain of the wood, perpendicular to the grain.
A more common application of this is sawing pieces of a board off on the end. Cross-cutting is done at a 90-degree angle, “crossing” across the wood.
Cross cuts can be made on practically any type of saw, but table saws are very effective, and able to create a more consistent and measured cut with little effort.
Miter Cuts
Miter cuts are another example of a common cut type that is made easier by a table saw, especially when performing multiple miter cuts for several workpieces.
A miter cut is a cut on the wood at any angle other than 90 degrees, meaning it’s an angled cut. There are a number of reasons for making miter cuts, such as creating corners on a piece or creating a way to make edges that are flushed together.
Table saws use miter gauges off to the side of the saw blade, and these gauges are usually able to be adjusted up and down the slot that runs parallel to the blade.
The gauge has a dial that lets you angle the workpiece to your exact desired angle, angling a small guide that positions the piece in that angle as it’s aimed towards the blade.
Ripping
Ripping wood is one of the oldest and most used types of cuts. Ripping wood involves cutting larger pieces into smaller ones, often lengthwise. This process can take one large piece of wood or sheet, and turn it into multiple pieces to be used for that particular project.
More often than not, when multiple rip cuts are being performed, those cuts are typically the exact same size.
The design and setup of a table saw allows for very quick and precise ripping when needed, which is why these saws are so popular on jobsites. A user can perform the measurements needed, set up the rip fence, power on the saw, and begin to make quick and efficient rip cuts until the material is done being broken down.
Rabbet
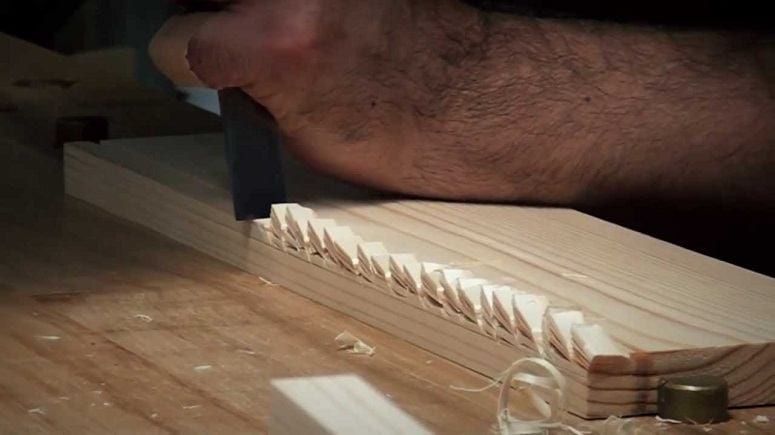
Rabbet cuts can best be described as a sort of puzzle piece in a way. With rabbet cuts, you cut away a portion of the workpiece in an even manner, which is almost always intended to be joined with a piece that has been cut the same way so they fit together.
For instance, picture a 2×4 board, and then picture the end of one. If you drew lines on the end of the wood and divided it into four even pieces, a rabbet cut would be when you remove one of those squares all the way down the piece.
This requires cutting the wood twice. First, you make a cut into the piece all the way down, rotate the wood, and cut all the way down again, which causes the cuts to join and thus remove that part of the workpiece.
Rabbet cuts are mainly used in furniture making, often with smaller items when they need to have edges and corners. There are a lot of ways to make rabbet cuts, but a table saw is by far the easiest, most precise, and takes the least amount of time.
Cutting Dadoes
While miters, crosscuts, and rip cuts are all relatively basic, the dado cut is 100% not. This is basically the most intricate cut you can make, and it’s also arguably the hardest.
A dado cut is essentially a joint that joins two workpieces together by intertwining multiple grooves together. Whereas a rabbet cut is just that one clean joint, dadoes are multi-pronged, and fit precisely together to fuse the joints into each other.
This is the preferred cut for building shelves and cabinets, and when done correctly, a minimal amount of glue or epoxy is needed to keep the pieces together. As with rabbet cuts, table saws are the best choice for performing a dado cut.
While there are several different ways to cut a dado, the most common method is to use a stacked dado head cutter on a table saw.
Fine Woodworking
Those who are more skilled at woodworking can find innovative ways to perform very intricate cuts and other methods that some would commonly reserve for saw like band saws.
You can find plenty of cool videos and articles online of skilled woodworkers using table saws in some very imaginative ways.
Table Saw Accessories
While table saws come with all the essentials for using them, there are still a number of accessories you should keep on hand, especially when it comes to safety.
Table Saw Safety Accessories

Goggles
Anyone that’s ever used a saw of any kind, whether it’s a table, handheld, or manual model, should be fully aware by now that protecting your eyes is not an option. Safety goggles are a must-have, so make sure you always have a good pair of goggle on hand.
You should always be able to see clearly while wearing them, and they should feel comfortable as well.
Gloves
Hand protection is another crucial part of table saw safety. While a glove may not do much in regards to protecting your hands from contact with a blade, they can protect you from flying debris and lose workpieces and any other tools you may be used in between.
Gloves also give you a better grip, which is always a good thing when running wood through a table saw.
Ear Protection
One of the only real drawbacks of a table saw is how loud they are. Even with higher end models, the noise level is still pretty bad, and long-term exposure to the noise without protection can eventually cause damage to your eardrums and hearing ability.
You have a lot of choices when it comes to ear protection. Ear plugs, small headphones, and full ear coverings are all worthy options, so go with whatever is the most comfortable and effective for you.
Other Accessories
Stand – Many of the table saws on the market come with some type of stand, but it’s not always a given, regardless of what type of table saw you’re purchasing. Even if you’re using a smaller benchtop table saw, having a stand gives you better mobility as to where you can use it.
There’s also the chance that the stand that came with your table saw is not very high quality. If you need to purchase s stand, look for one that can be easily folded up and stored away when not in use, and also offers fast, easy setup, and of course, provides a large amount of stability as well.
Miter Gauge – Another crucial saw accessory that is not always included with a table saw. Or, like the stand, you might not like the quality of the stock miter gauge.
Look for miter gauges that are easy to adjust, and require very little tuning or tinkering throughout use. Miter angles need to be exact, so you need a gauge that can actually get the job done.
Anti-Friction Spray – Having a clean and smooth table surface is a good way to ensure your material always slides effortlessly across the work surface and into the saw blade. Anti-friction spray, sometimes called table and surface lubricant, can help out greatly with this.
The spray eliminates friction on both table saws and hand tools, while also repelling dust and moisture, and prevents rust and corrosion. It’s inexpensive and makes a huge difference.
Dustbag – Flying dust and debris is the bane of any mounted power saw’s existence. Everyone hates dust flying around all over the place, it gets in your face, hair, and clothes, created a mess on the ground, and gets all over the saw, blocking your vision and making for some long cleaning hours.
Hooking up a dustbag and hose to your saw’s vacuum attachment is an effective way to trap the dust and keep it contained while you do your work. These are cheap, and save you from a lot of headaches.
Table Saw Blades
Table saw blades help determine the style of cuts to be made on a workpiece. You can obviously get by with pretty much any blade if you’re the only goal is settling for whatever cut you can get, but tailoring blades to specific tasks sustain much more desirable results.
There are four basic blade types, determined by the shape, or grind, of their teeth. They are a flat top grind (FTG), alternate top bevel (ATB), combination (ATBR), and triple-chip grind (TCG.) For the most part, table saw blades are typically 10 inches, although some larger models can go 12 inches or even larger.
- FTG – Longer blade teeth, best for general sawing and ripping, when smoothness isn’t critical.
- ATB – Angled across the top edge, better for creating cleaner cuts, can still be used as an all-purpose blade.
- ATBR – Combination of FTG and ATB teeth. Creates moderately smooth cuts, while still being able to handle tougher materials with ease.
- TCG – Smaller teeth, with FTG teeth spaced throughout. The chamfered tooth roughs out the cut, while the following FTG tooth basically cleans it up. Best for sawing dense materials like plastic laminate, and solid materials like Corian, and non-ferrous metals like brass and aluminum.
Diy Table Saw Fence (Step By Step Guide)
Every table saw needs a rip fence, but if yours isn’t cutting it, or you simply don’t have one, you can make your own with only a few materials and a little ingenuity. Sure, it will be a little crude, but it works very well, and you can always customize the look a bit later.
What You’ll Need:
- Drill
- 2×4 board
- 2 Countersinks
- arrow-right 2 heavy duty screws or nuts with enough excess length to attach handles
- arrow-right 2 screw on handles
- arrow-right Sander
Instructions:
- Begin by squaring and measuring your table width, so you’ll know how long to make the fence.
- Using a 2×4, cut the piece to where it’s 0.5 inches longer than the table on each end. Then cut a 5 inch length of the 2×4 in half widthwise, so you have two separate pieces.
- Using two heavy-duty screws, on each end, attach the end pieces so there’s even overhang on each end when the fence is placed on the table. It should line up exactly like an ordinary fence would, without any gaps.
- Line the fence up, and use a drill to create the countersink hole, where you’ll insert the nut.
- Insert the nuts on each end, with the threaded side sticking out.
- Using a bolt or handle, screw them onto each end. This will provide the pressure to the fence to get it to lock in position.
- If necessary, use a sander to smooth out the bottom of the fence so it slides along the table easier.
- Square the fence up next to the blade. If the fence is perfectly parallel, you’re good to go.
How To Use A Table Saw?
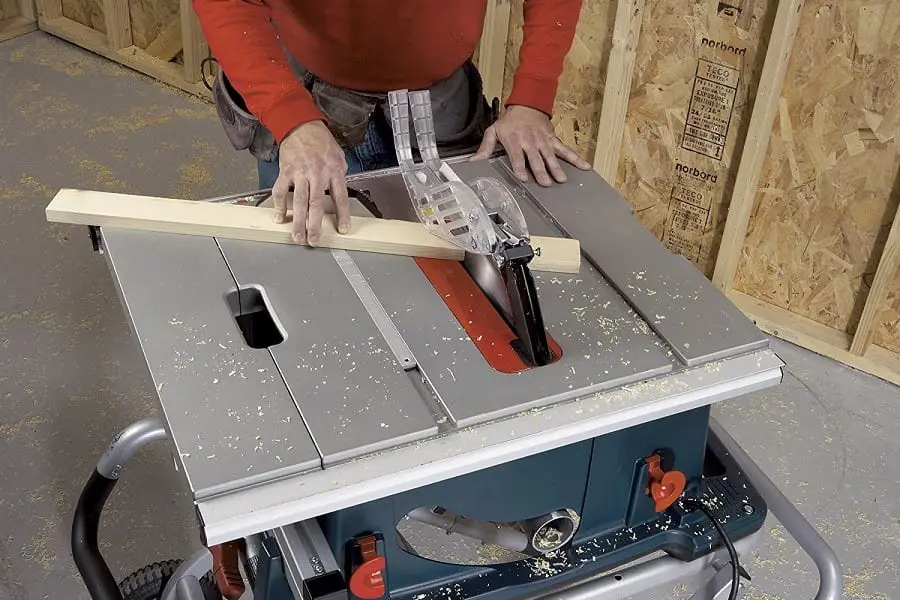
There is no all-purpose way to use a table saw, as each approach depends on the type of cut you are making. With that said, here are the general steps when making any cut.
- Unplug saw.
- Clear the surface.
- Adjust the blade height to ¾ inch above your workpiece’s height.
- Make any needed adjustments to the miter angler or rip fence.
- Load the workpiece.
- Plug in and turn the saw on.
- Run the piece through the blade using your hand or push stick.
- Once the piece has been fully cut, turn the saw off, and unplug if finished.
5 Crucial Table Saw Safety Tips
When using any power tool or saw, safety is of the utmost importance. This is even more true with a table saw.
Here’s the thing. The table saw is responsible for more serious injuries to novice and DIYers than any other type of saw.
It’s not hard to figure out why, as the table saw is a giant blade sticking out of the middle of a table. There’s a lot of things that can go wrong…IF you’re not careful.
So, be careful. Here are five easy ways to do just that:
- Do NOT start the saw while the material you’re cutting is touching the blade.
- ALWAYS use the rip fence when doing rip cuts, don’t freehand it.
- Always use the miter gauge–NOT the rip fence–for making crosscuts. The fence does not provide the support needed.
- Exclamation Triangle Keep material completely flat against the table during the cut.
- Exclamation Triangle Turn the power off when not in use, and unplug when performing any adjustments or maintenance.
Table Saw Maintenance
A table saw is just like any other power tool: the better you take care of it, the better it works, and the longer it lasts. Here are some essential table saw maintenance how-to’s.
How To Tune Up A Table Saw?
A well-tuned table saw is a safe and accurate table saw. The process is fairly extensive, so here is an excellent video from WOOD Magazine on how to do so.
How To Keep Your Table Saw Rust-Free?
Rust is the biggest enemy of your power tools, and that includes the table saw for sure. Fortunately, rust is easy to prevent; all it takes is a little initiative.
Carnauba-based paste wax (car wax) is an easily accessible and incredibly effective material to keep your table free of rust.
All you have to do is use a damp sponge to rub it into the table, and then let it dry. Once dry, just buff it out with a clean cloth. Add a second coat if need be, just make sure it’s not gumming up the slots and miter gauge.
Do this every other month, and you’ll not only have a table free of rust but a smooth table that lets the workpiece glide right along as well. Of course, you can always use specialized products as well. Just follow the instructions, and you’ll be good to go.
How To Clean Table Saw
After months of use, your saw assembly can get pretty gummed up from dirt and debris. Cleaning it up will let it run like new, and prevent damage in the future.
Begin by unplugging the saw, and then take off the throat plate, blade guard, and the blade. Check for any resin buildup, and clean it off.
Now use an air compressor, or a can of air to spray dust out of the gears and crevices. Using steel wool and an old toothbrush, scrub off any remaining debris in the gears, and use another old brush to apply the aforementioned car wax in a thin layer.
Put everything back together, and you’re all set.
Conclusion
Hopefully, by now, you see why table saws are an essential and incredibly versatile tool for woodworkers and DIYers on any level. A table saw should be the cornerstone of your large power saw inventory, and can provide decades of use with proper care.
Are you interested in a table saw, and not sure where to start? Take a look at our handy table saw buying guide, where we go in-depth with our top table saw picks in a variety of types and budgets, and follow that up with all the information you need to make the right purchase for your needs.
Resources
Woodcraft
Wikipedia
FamilyHandyman
eHow
OHSOnline
HomeStratosphere

