As someone who is interested in DIY projects, there will be a time when you have to cut a straight line in a piece of wood. Simple enough, right?
Unless you’re a seasoned pro who can make cuts in your sleep, it’s a lot more challenging than you might think.
You can start off doing well – making a nice attempt at cutting straight, but the longer your cut is, the more challenging it is to keep the saw straight.
That is where a saw guide can be of great help. Of course, if you don’t want to spend a lot of money on a table saw, or a radial-arm saw.
In fact, you can make a few of these guides so that you can cut different sized boards for various projects.
Contents
Tools And Materials To Create Your DIY Saw Guide

To create a saw guide, you will need a full sheet of 1/2 inch MDF or plywood. You’ll also need your favorite wood glue, a box of 3/4 inch screws, a screwdriver, 2 or 3 clamps, a framing square and your circular saw.
In most instances, you can get a 2’ x 4’ sheet of MDF at your local home improvement store for about $6. If, you don’t plan on making a bunch of these guides, you can get away with a 2’ x 2’ board.
You don’t have to paint your guides, but if you want to, you’ll want to use a good primer and paint. By finishing the guides, you’ll ensure that they are protected from moisture damage, thus making it last longer.
Cutting The Pieces For Your DIY Saw Guide
Your guide will be comprised of three pieces: a base, a fence, and a stop. The base will give you a surface for your saw to move on while making your cuts. There will also be enough room for you to clamp your base to whatever you want to cut.
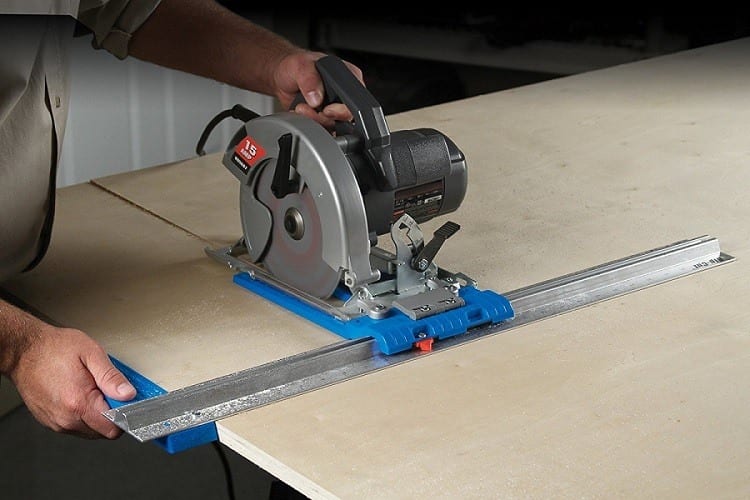
The fence is going to act as a guide to point the shoe of your saw in a straight line while cutting. The stop is going to let the guide rest against the piece of wood you wish to cut.
- The measurements for the base should be 24” x 12”
- The measurements for the fence should be 24” x 3”
- The measurements for the stop should be 13” x 2”
These pieces are good sizes to cut a piece of wood that is about 20 inches wide.
Note: Before you make any cuts, you will want to mark the factory edges, which are the natural edges of the board. These cuts are made in the manufacturing process, and you can bet that the edges are straight and square. This will allow you to take advantage of the straight cuts when assembling your guide.
You will want to make the edges with your pencil. You should plan to use the factory edge that you haven’t made any cuts from as the front of your guide.
On the smaller strop, use the factory edge of the fence as the side that the saw shoe will be in contact with. The factory edge on the stop will be the side that touches the piece of wood you wish to cut.
Aligning The Pieces Of Your DIY Saw Guide

The best way to ensure that you will always make a square, straight cut when you use the guide is to ensure that both the fence and the stop are properly aligned when you attach them.
This means that your guiding edge of the fence (the edge that will guide the saw) and the alignment edge of your stop (this is the edge that will rest against the piece of wood to be cut) are perpendicular to one another.
You can make sure the pieces are aligned correctly by clamping your framing square to a base. One edge of the framing square should be aligned with the base.
Then you can put the fence on top of the base and the stop on the bottom of the base at the other edge of the square.
Assembling Your DIY Saw Guide

With the fence and stop in place, you will want to attach these pieces with wood glue and screws. You want to double check to make sure the pieces are properly aligned on the edges of the framing square.
Next, spread your wood glue on the surfaces of wood that will touch. Use a couple of clamps to apply pressure; allow the wood to set for about 30 minutes or so.
After you’ve clamped the pieces together, double check the alignment to make sure everything is still square.
Put a couple of screws in the fence and the stop, further attaching the pieces to the base. You can make this task easier by drilling a couple of pilot holes.
Just be sure that the screws do not poke through the other side. If there is any access glue, you can wipe it away with a damp cloth or paper towel before it can dry.
After the glue has dried, you will want to leave the edge of the base hanging, so your blade isn’t going to cut anything you don’t want to.
Carefully, hold your saw base against the fence as you cut the base, making sure that the base is perfectly matching your saw and there is zero clearance edge that will give you a chip-free cut if you are cutting veneers.
Using Your New DIY Saw Guide
Now that your DIY saw guide is complete (remember, primer and paint is optional) is incredibly simple. All you need to do is create a pencil mark on your cut line.
Clamp the saw guide on the edge of that mark and cut. The shoe of the circular saw will glide along the fence, making your cut!
Resources
ThisOldHouse.com
WWGOA.com


