In the realm of contracting and do-it-yourself projects, a healthy assortment of saws is an absolute must.
And while there may be some debate as to which saws are more required than others, the miter saw remains universally appreciated for its pure effectiveness in cutting several different types of materials.
Miter saws don’t have much of a learning curve and are generally easy to operate for even the most novice user.
Depending on the type of projects you plan on undertaking the most often, a miter saw can be a valuable ally that significantly reduces your time spent cutting materials.
Unsure as to whether or not you can benefit from owning a miter saw? Below, we’ll go through all of the vital information you need to know about these saws, explaining what they’re best for, advantages, different types, and more.
Let’s begin by first defining what a miter saw is — and what it’s not.
Contents
What Is A Miter Saw?
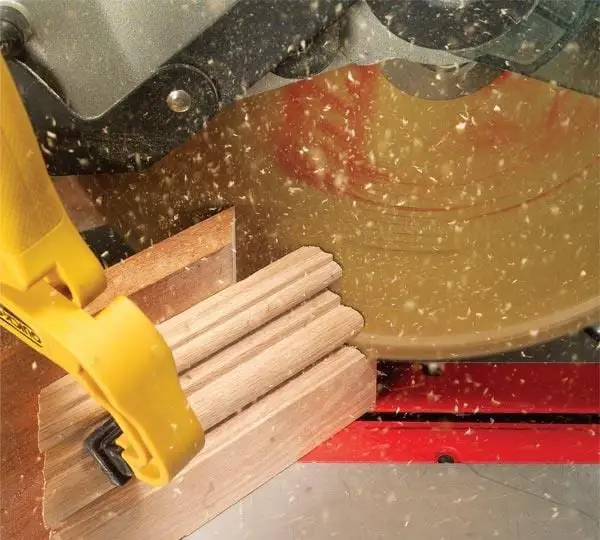
By definition, a miter saw is used to make crosscuts and miter cuts in a workpiece. It is done by pulling a mounted circular saw blade down onto the piece that has been placed on a flat surface below.
This style of sawing is stationary, as you bring the saw blade down onto a piece to cut it, rather than running the saw blade along the piece. Think of it like slicing a carrot by feeding it towards a kitchen knife as you continue to make cuts until all you have left is circular pieces left.
When using a miter saw, the workpiece is usually held against the saw’s fence, giving it a precise cutting angle between the plane of the blade and the plane of the longest workpiece edge. When cutting in standard position, the cutting angle is 90°.
For most users, these saws are useful for cutting down larger pieces into smaller ones so they can be refined more using other types of saws.
This isn’t to say that miter saws can only perform 90° cuts, however. A primary advantage with a miter saw is how you can rotate the blade to varying angles, most commonly 45°. That allows users to make quick angled cuts for any number of workpieces.
Some miter saws have additional features and abilities, but we’ll get to that further down.
A Quick History Of The Miter Saw
Tracing the exact history of the miter saw is a bit tricky, mainly due to the fact that the saw is a combination of things, and in most practical terms, a circular saw mounted on a retractable arm. So in that sense, consider the history of the circular saw first.
As for the modern version of the power miter saw?
That was invented by Ed Niehaus, a tool designer for Rockwell, in 1964. His original design miter saw displayed many innovations that you can still see in today’s miter saws, such as radial arc spring action, blade braking, and dust collection.
Rockwell chose not to patent the design, so many other manufacturers jumped in soon after and continued to make improvements, and here we are now.
What’s The Difference Between Miter Saws And Circular Saw?
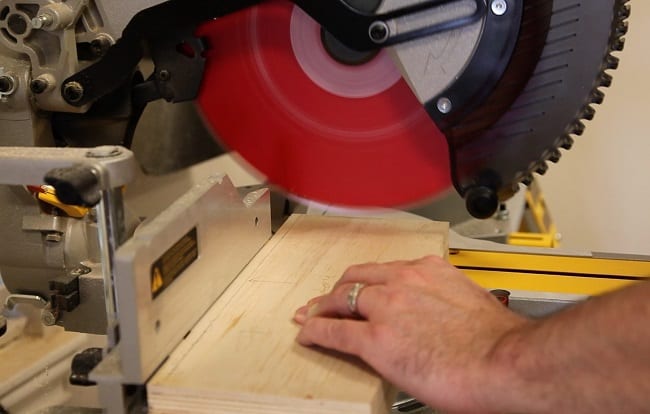
As we said earlier, miter saws are basically a variation of circular saws in a way, but the critical difference is that one is mounted and one is not.
Circular saws are handheld and designed to make long or short cuts across a piece. They have more versatility, but they are also more dependant on the actual user. And while they are good for making short crosscuts on a piece, they aren’t as efficient.
Miter saws have more of an assembly line type feel. Once you have the piece lined up and ready, you just drop the saw down and make the cut, and move on to the next.
But there is the difference.
Miter saws can only make a cut that is as long as the blade itself. You can’t feed a piece into the blade and make long cuts, nor can you run the saw along the piece to make long cuts like you can with a circular saw.
This makes miter saws pretty limited in what they can do, but if your projects or work involve the need to cut multiple workpieces quickly with robotic-like accuracy, a miter saw can be a big help.
What’s The Difference Between Miter Saws And Jigsaws?
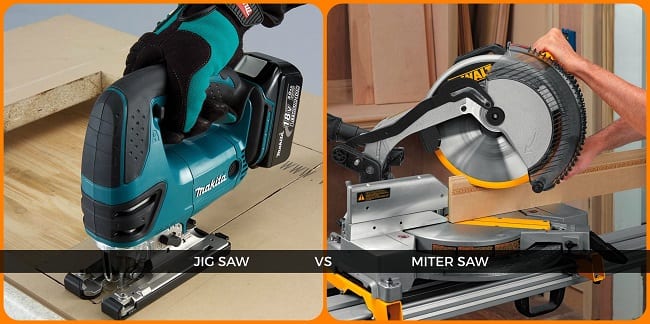
While miter saws are similar to circular saws in a few distinct ways, they could not be any more different from a jigsaw.
Jigsaws are primarily used for making complicated or intricate cuts in wood, which includes decorative cuts, or any other cut that can’t be accomplished with more limited saws. Rather than a round blade, jigsaws use a small flat bladed that goes up and down and allow the user to move it in any direction.
It gives the jigsaw more of a “freehand” feel since the user isn’t running the blade along a workpiece that’s positioned against a fence.
It’s not uncommon to see jigsaws used in conjunction with miter saws. First, you would use the miter saw to cut down a particular piece, and then use a jigsaw to refine it further if needed. So in that sense, the miter saw is the first step, with the jigsaw being step two.
What Is A Chop Saw?
Sometimes it’s common to see people use the terms “chop saw” and “miter saw” interchangeably. This is understandable, as they both do the same thing, and look similar.
Basically, a chop saw is a stripped-down version of a miter saw. As the name suggests, the saw can only “chop,” as in making a downward motion, and that’s it. Miter saws can rotate to cut at angles, and sometimes make bevel cuts as well.
So, when you hear someone say chop saw, assume that it’s just a basic saw with a circular blade that can lower down to make a crosscut at a straight angle.
Anatomy Of A Miter Saw
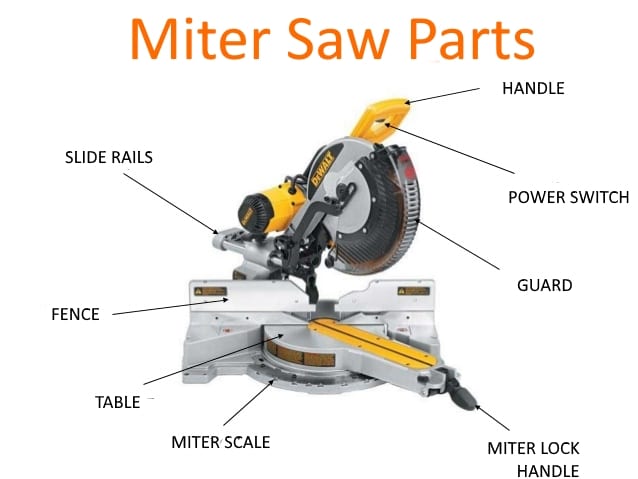
In order to get a proper understanding of a miter saw, it’s important to know all of its major components, and what they all do.
Some miter saws will be set up a little differently, and may or may not have some extra features as well, but the components listed below are the most common ones you’ll see with them.
Blade
The blade on the miter saw is responsible for all the cutting work and drops down onto the workpiece. Due to the way miter saws cut, the size of material they can handle is directly related to the size of the blade, since the blade is representing the cutting capacity.
You can find miter saws in a number of different sizes, with the majority of them being around 5-7 inches. These are not all that hard to bring with you onto a job site. Experienced do-it-yourselfers and contractors sometimes have a large blade model in their shop, often around 12 inches in diameter.
Miter saws come in 4 regular sizes: 7-1/2in, 8-1/2in, 10in, and 12 in. However most of the miter saws on the market come with 7-1/2in. Check out our buying guide to find one that suits you best.
Guard
The blade’s guard is fitted around the blade and covers the entire top half, with the bottom portion connected to a hinge. The guard protects both you and the blade when in use — and when not.
While the top half is immovable, the bottom half of the guard is connected to a hinge that swings open as you lower the blade down, creating an opening in relation to how far you’ve lowered it. By the time it reaches your workpiece, the bottom guard portion is completely out of the way, returning as you raise the saw back up.
Saws that don’t have a hinged guard have a design that lets the bottom half pivot up and into the top half as you lower it.
Handle/Power Switch
The handle and its power switch are part of the same assembly, not to be confused with the saw’s main power switch. Most saws have a trigger-like power switch integrated into the handle, so you can power the saw as you hold the handle to lower it down.
It lets you have total control over the blade with the same hand. Most handles tend to have at least somewhat of an ergonomic shape to them, and with the power trigger as well. Letting off the power trigger will automatically cause the blade to cease spinning, coming to a complete stop a few seconds later.
Table
The table of a miter saw is the large flat portion to which the saw is connected. That serves as both a base for the saw and your actual work area.
The table has several other components mounted to it as well, and it may or may not have clamps. There is a slot in the table where the blade can go into as you bring it down onto your workpiece.
Fence
The fence of the miter saw is the flat, sturdy surface that you can place your workpiece up against to keep it stable. It is mounted directly on the table and runs perpendicular to the saw’s 90° position.
Depending on the model, some fences have some extra features that allow you to move them to different positions, or provide quick and convenient workpiece measurements as well.
Vise
It’s fairly common now for miter saws to have a vise grip on at least one side. It gives you another option for stabilizing the saw on the surface where you’ve placed it, or for holding longer workpieces in place, keeping them supported as you lower the blade into them.
Scale
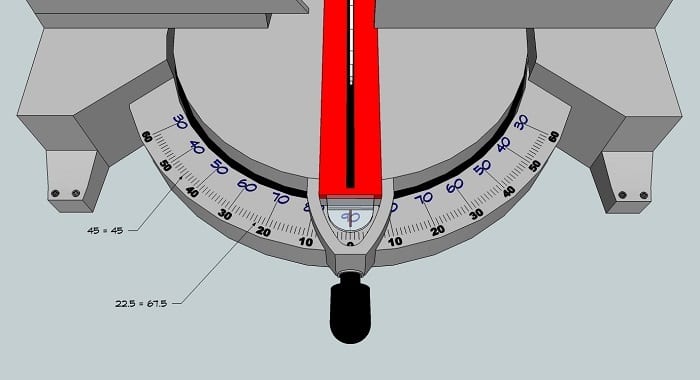
The miter saw’s scale is used to determine what angle you are cutting at when making any degree of the miter cut. This will rotate with the saw as you turn it, with an indicator built into the table that points to what degree you are at.
Some scales also have stops in them that let you quickly move over and lock on popular cutting angles, such as 45°, 90°, and 22.5°.
If you have a compound saw capable of cutting bevels, there will be an additional scale on the saw’s arm that indicates the degree it’s angled at.
Additional Components
Some miter saws come with some extra features and functions that can do everything from ensuring more precise cuts, to keeping the area cleaner. These include items such as laser projectors, dust bags, ports for a vacuum, etc.
What Is Miter Saw Used For?
Miter saws have a limited range of use, but they are capable of making at least two types of cuts, and sometimes three.
Crosscuts
A crosscut refers to any straight-angled cut that you perform across a workpiece that is parallel with the edges. This is something as simple as cutting off the end of a 2×4 board to make it a 2×3.
Crosscuts are easily the most basic of all cuts, something that any other saw is certainly able to do. The advantage with a miter saw is that you simply drop the blade down onto the workpiece in one motion, which is much easier and precise than any other method that relies on you guiding a blade through a piece.
Miters
As you’ve probably guessed, a miter cut is where the saw gets its name from. Miter cuts refer to any angled cut you make through a piece. While crosscuts run parallel to a workpiece’s sides, miters run diagonally at any degree of angle.
It doesn’t mean the blade itself is angled, however, just the direction that it’s cutting. There are guides on the miter saw’s base that lets you position your piece at the exact angle you need it cut before dropping it down.
Again, just as with crosscuts, this is much easier to do when using a miter saw that can perform the cut without any manual maneuvering of the blade.
Bevels
A beveled cut is any cut that is angled through the workpiece instead of across it.
For instance, imagine a 2×4 laying flat. Now imagine a cut in the middle of the board that slices downwards at a 45° angle. After the cut has been made, you should be able to slide the two pieces back together to as they overlap on each other where the cut was made, and they’ll fit perfectly back together.
Not all miter saws are capable of tilting the blade at an angle, which we’ll get to below.
Common Uses For Miter Saws

Despite having a somewhat limited range of uses regarding the cuts and workpieces accommodated, miter saws are preferred for some of the most common woodworking and construction needs.
Since miter saws are primarily used for making miter cuts, they are especially helpful for making things like frames, crown molding, gates, boxes, ledges, and more.
The quick cutting action and easy angle adjustments let users cut pieces to exact angles in just a few seconds, providing the capability to go through a lot of workpieces in a short amount of time.
They are also good for when you need a lot of smaller pieces out of a longer workpiece. With a pencil and measuring tape, you can quickly mark where each cut should be, and then start making the cuts on the piece, working all the way through it in a minute or so, depending on the size.
Miter saws are a common sight on construction sites, especially during the framing phase. Large miter saws can be set up and used to trim down wall studs and other framing components, and also cut the required angles in any of them as well, all in just a few minutes.
Some fence builders and roofers also bring a miter saw over to the job site, letting them trim down fence pieces and roofing materials quickly and accurately.
Other types of contractors can benefit from miter saws as well. This includes plumbers, who can use them to trim piping when using special blades that can handle the material.
In regards to the home hobbyist or DIY enthusiast, a miter saw merely offers a quick, accurate, and easy way to make smaller crosscuts, miters, and sometimes bevel cuts right there in your garage or shop, rather than relying on a handheld circular saw.
Types Of Miter Saws
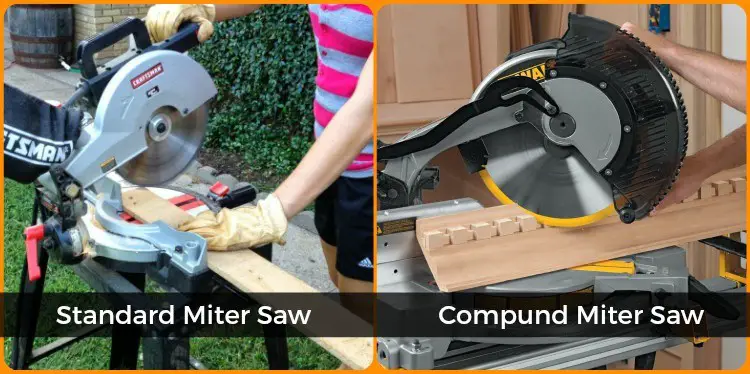
Miter saws come in a few different varieties, each one offering an ascending level of functionality and cutting ability.
Standard Miter Saw
The most basic of miter saws (as in, not a chop saw,) offer straight cuts in a variety of angles. The cutting size is dependent on the blade size, but all miter saws can at least cut in 90° and 45° angles.
Extra features may vary, but know that miter saws at a minimum provide basic miter and crosscuts. These are ideal for those continually working with framing, or anyone with basic cutting needs.
Compound Miter Saw
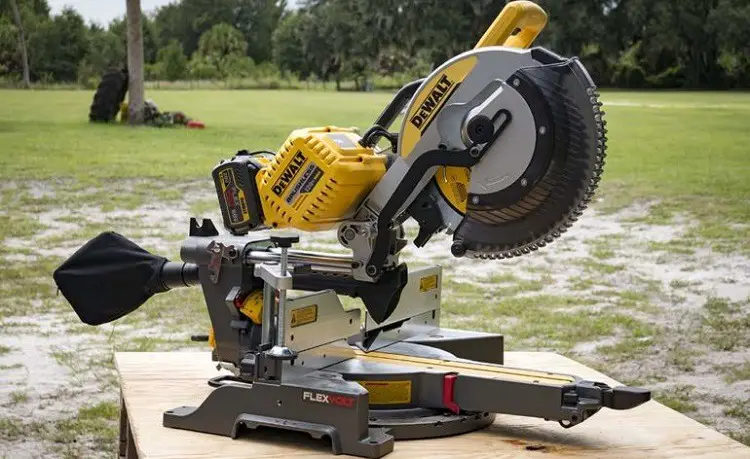
When you see a miter saw listed as a “compound” miter saw, this means that it possesses the ability to rotate the blade head at a particular variety of angles from the board, letting you cut the wood at an angle beyond just the basic 90°, such as bevels.
This allows a ramp-angled cut into the side of the wood, and also allows for more complex cuts that are used when doing trim work for homes. A compound miter saw is known as a single compound miter saw, which refers to the saw’s head only rotating on one side. Other angles require the user to flip the board t in the other direction.
A dual compound-miter saw allows the head to rotate on the left and right hand of the saw. This comes in handy when doing numerous types of decorative trim work, saving you from having to flip the board to cut the same angle on the other side of the workpiece.
A sliding compound-miter saw adds what’s known as a radial arm saw feature, letting you move the saw head back and forth, thus increasing the board size that can be crosscut.
This gives the saw a wider range of cutting options for larger workpieces and drastically improves the functionality of the saw. By having the ability to slide the saw’s head, you can cut pieces that are wider than the blade, essentially doubling its cutting capacity.
For instance, say you have a 5-inch blade and a 8-inch wide workpiece. With a sliding compound miter saw, you can drop the saw blade down onto the piece like you normally would, and then push the saw head away from you as it cuts the final 3 inches of the workpiece.
If you want to ensure your accuracy when using a sliding compound miter saw, you can get one that has lasers and LED style guide.
The laser component is often a disc-shaped washer piece that attaches to the saw blade and aims down, showing exactly where the blade will cut. The LED lights add some extra visual clarity to your work area.
Miter Saws Safety Tips And Precautions

As with any saw, proper safety is essential when operating one. Miter saws are extraordinarily powerful when compared to other saw types, so you need to be well aware of the right way to use it, and what precautions to take to protect yourself and others.
Here is a list of dos and don’ts when using any miter saw.
- checkAlways make sure you have an eye and ear protection before operating any size of the miter saw.
- checkMake sure the blade guards are in place and operating in a normal fashion. Without turning the saw on, raise and lower the saw head a few times to make sure the bottom guard is retracting or moving out of the way like it’s supposed to.
- checkAlways unplug the saw, or lockout its power when making any adjustments to the blade, or when changing the blade out.
- checkKeep your fingers and hands at least 6 inches away from the blade at all times.
- checkCheck and tighten both the blade and the blade-attachment mechanism on a regular basis.
- checkWhen using a sliding miter saw, start your cutting with the blade closest to you, plunge downward into the workpiece to start cutting, and then push the blade away from you on its sliders as you cut through the rest of the piece.
- Avoid wearing any type of gloves, bracelets, necklaces, or any other kind of long jewelry or clothing when operating a miter saw. If you have long hair, pull it back. You don’t want anything dangling that could get caught up in the blade.
- Never use anything other than the recommended blade size.
- Never do any cutting freehanded.
- Never cut tiny pieces of material.
- Do not ever reach into the cutting area until the blade has completely quit spinning. It will prevent you from coming into contact with a coasting blade, as it’s still dangerous even at lower speeds.
- Ensure before operating that the blade and its washers and fasteners are in the right position, and secured on the saw’s arbor.
Popular Miter Saw Brands
There are now several different manufacturers that put out miter saws, but the four below remain among the most popular due to the quality and features offered with their models.
DeWalt
Easily one of the most popular power tool manufacturers period, DeWalt is a favorite among professionals and contractors, as they are well known for offering incredibly durable tools for a fair price point. They have an extensive history as a saw manufacturer.
The original version of the company got its start in 1923 from a man named Raymond E. DeWalt, who just so happens to be the inventor of the radial saw. After two decades of rapid growth, DeWalt was reorganized and officially became DeWalt Inc in 1947.
Makita
Makita was initially established in Nagoya, Aichi in Japan by Saburo Makita in 1915. They originally sold lighting equipment, motors, and transformers. The company went through some changes, during and after WWII, and started focusing on power tools such as drills.
Today, Makita miter saws are very popular, and often a top seller in certain categories. Those that use them regularly praise Makita saws for offering notable value in correspondence to their affordable price.
Bosch
Bosch is a very recognizable brand in power tools, with a wide range of products that span everything from construction tools to automotive tools. They are also one of the oldest tool companies, as the company was started way back in 1886 by Robert Bosch in Stuttgart, Germany.
Bosch miter saws are often preferred by professionals working in the construction industry. They are known for being among the most powerful and heavy-duty.
Hitachi
Hitachi has a very long and storied history since being founded in 1910 by electrical engineer Namihei Odaira in Ibaraki Prefecture. The company originally made electrical motors for many years, but that all changed after WWI, which nearly wiped the company out.
Hitachi made a comeback by manufacturing via defense contracts for the United States and is now headquartered in Chiyoda, Tokyo, Japan. They now have 15 divisions that cover things like financial services, power systems, automotive, and of course power saws.
Hitachi miter saws are part of an extensive lineup of saws that are known for innovative features and easy operation.
Miter Saw Maintenance And Cleaning

Miter saws are not very complicated tools, but like any other power tool, proper maintenance and cleaning will help them perform better over the long run, and prevent other issues from developing.
- The first thing you’ll need to do is clean sawdust off the work area. An air compressor is great for this if you have one, as you can blow the dust off easily. If not, a shop rag will work. Canned air is good for tight spots.
- After this, move onto the table and fence areas. Using a scotch brite sponge, wipe in circular motions to get rid of any particles that have built up or caked onto the surface. Mild surface cleaners that are okay for metal will work as well.
- The blades come next. Using your hand, rotate the blade and remove any debris, and then use a metal brush to get the rest of it. You can then apply some oil to the blades, but be sure to check your saw’s manual beforehand.
- If your blades are starting to seem a little dull, use the appropriate blade sharpener and methods detailed in your saw’s manual.
- Now it’s time to check the moving parts of your saw. Any areas that seem a little stuff can be lubed if permitted by the manufacturer. Also, check for loose nuts and bolts, and then check the power cord for any cuts or wear.
Conclusion
While miter saws are appropriate for specific cuts and sizes, those applications happen to be the ones you’ll need most often when doing most types of woodwork or construction projects around your home or property.
Anyone looking to establish a necessary inventory of saws for home or contracting use will benefit by purchasing a miter saw that is right for their own particular needs.
If you’re in the market for a new miter saw, be sure to check out our miter saw buying guide to see our top picks across a range of budgets and types.
Resources
Defense.gov
DIYnetwork.com
ThisIsCarpentry.com
Hunker.com

